
In modern embedded product development, designers use powerful tools like Figma, while engineers rely on optimized embedded GUI frameworks like Flint.
But traditionally, connecting these two worlds has been slow and manual—exporting assets one by one, recreating layouts, resizing images for low-memory devices, and adjusting color formats for MCUs and MPUs.
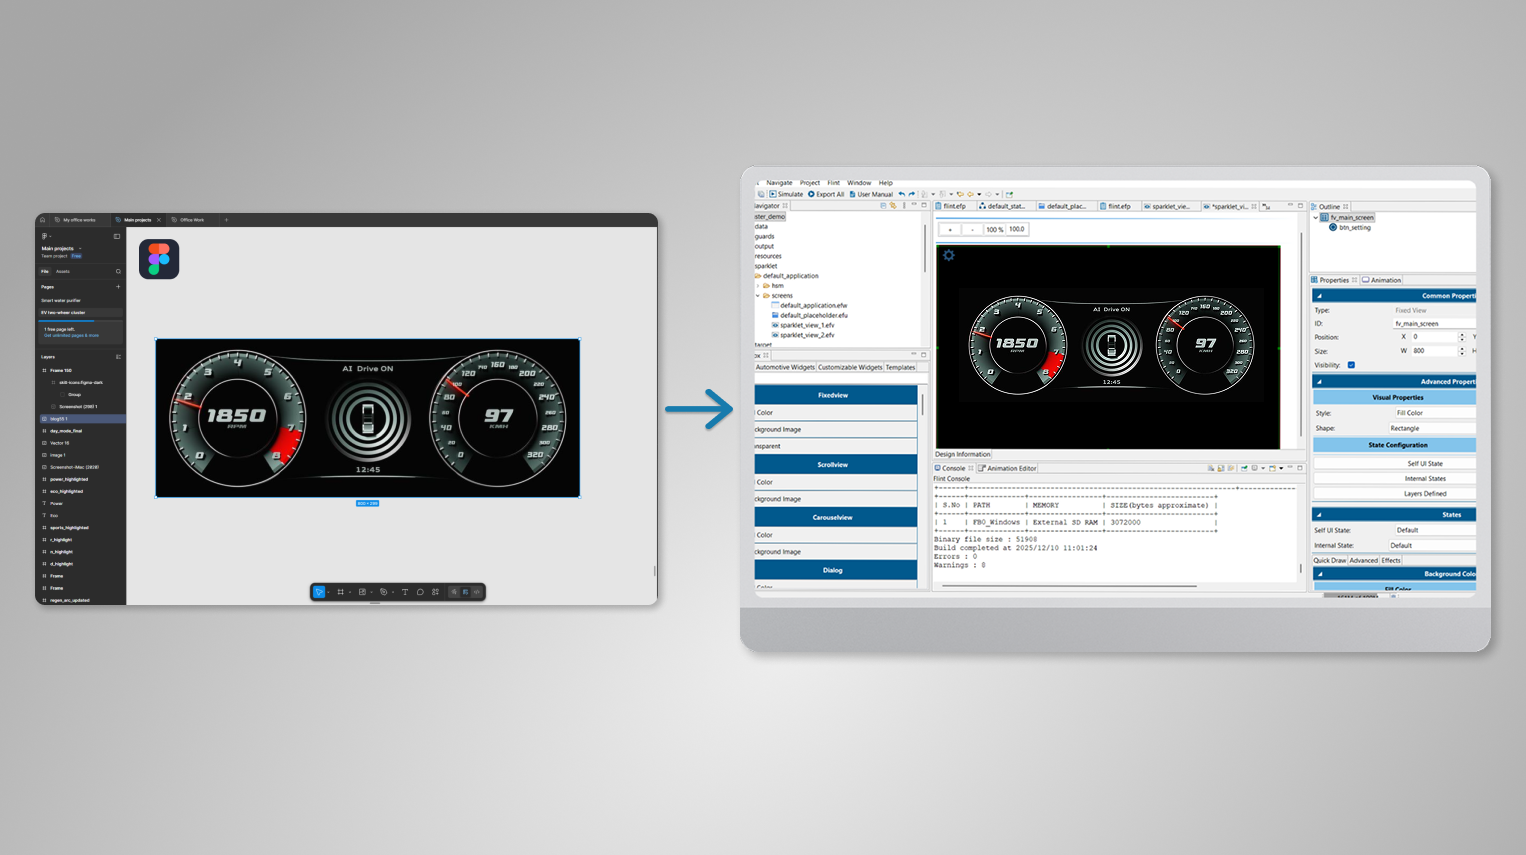
The Figma to Flint Plugin solves this gap by introducing a direct, automated, design-to-embedded workflow. With a single export action, designers can convert Figma designs into Flint-ready assets and layout files—saving hours of manual effort and eliminating human errors.
What the Plugin Does
The Figma to Flint Plugin acts as a direct translator between your design and your embedded UI project. With one export, it delivers:
- Optimized image assets
- Correctly sized layouts
- Accurate layer hierarchy
- Fonts and style mappings
- Component grouping for Flint widgets
- Screen-level metadata
This means your Flint project opens exactly as your Figma design looks.
Key Features
Smart Asset Export: The Figma to Flint plugin streamlines the entire design-to-embedded GUI workflow by automatically exporting pixel-perfect PNG assets optimized for low-memory MCUs and automotive-grade embedded displays. Designers no longer need to manually slice or resize images—the plugin generates pre-compressed, hardware-ready assets ideal for platforms like Renesas RH850, RA, and RZ/A series.
Auto-Generated Layout Files: Along with assets, the plugin produces fully auto-generated layout files, preserving frame hierarchy, absolute coordinates, spacing, margins, and grouping exactly as designed in Figma. This eliminates hours of manual layout reconstruction inside Flint and ensures consistent UI structure across multiple screens and versions.
Intelligent Widget Mapping: Another powerful capability is the intelligent component mapping, where Figma layers are automatically recognized and converted into Flint widgets such as images, text elements, buttons, progress bars, sliders, and other interactive components. This speeds up embedded UI development and reduces repetitive manual configuration.
Design Consistency Between Teams: The plugin ensures strong design consistency between teams, maintaining accurate fonts, colors, sizes, and visual styles from the original Figma design. By providing a single source of truth for designers and embedded developers, it prevents mismatched assets and enables a smooth, reliable workflow for automotive clusters, industrial HMIs, and IoT display projects.
How It Works — Simple, Fast, and Accurate
Before exporting your design, it is recommended to follow the design guidelines provided for the Flint workflow. These guidelines help ensure that layers, groups, and components are structured in a way that Flint can interpret correctly, resulting in a smooth and predictable Figma-to-Flint experience.
Exporting the Flint File from Figma
Once your design is ready, the export process is straightforward. You begin by selecting the desired Figma screen and launching the Figma → Flint plugin from the plugin menu. The plugin presents a clean export dialog where you can name your output file and generate a ready-to-use package. After choosing where to save it, the plugin creates a ZIP file that contains the original Figma .fig file along with an automatically generated image folder. This folder holds all visual assets extracted from your design—already optimized for embedded displays, low-memory MCUs, and Flint’s resource pipeline.
Importing the Figma File into Flint EFV
After extracting the ZIP, you simply move the .fig file into the Flint project’s resource directory and place the exported images inside the corresponding images folder. With both the layout file and assets in place, Flint has everything it needs to recreate your UI.
Inside Flint, importing the Figma design feels effortless. Creating a new EFV file reveals an option to import your Figma file directly. When enabled, Flint opens your project’s resource folder, allowing you to pick the .fig file you placed earlier. Once selected, Flint processes the design, builds the layout, maps widgets, and reconstructs your screen inside the EFV—faithfully preserving your original Figma composition.
Benefits for Designers, Developers, and Product Teams
For Designers: Designers can focus on creativity without worrying about embedded display limitations, while instantly previewing how their screens translate into Flint for automotive, industrial, or IoT UIs.
For Embedded Engineers:The plugin eliminates manual slicing and layout recreation by generating hardware-optimized assets and coordinates perfectly suited for RH850, RA, and other low-memory microcontrollers.
For Product Teams: Teams benefit from faster release cycles, reduced rework, and a UI that accurately matches the final embedded product from the beginning.
Why This Plugin Matters for Embedded UI Development
Traditional design-to-embedded workflows are slow and manual, often taking weeks of slicing assets, fixing layouts, and resolving inconsistencies. The Figma to Flint plugin streamlines this entire journey into a simple flow — Design → Export → Import → Run on MCU — bringing speed, accuracy, and seamless collaboration to modern embedded UI development.
Conclusion
The era of manually coding pixels for embedded screens is over. By adopting the Figma to Flint Plugin, product teams can unify their workflow, reduce time-to-market, and deliver stunning visuals on even the most resource-constrained hardware. Whether you are building next-gen automotive cockpits or smart home thermostats, this embedded UI design automation tool is your bridge from concept to reality.
Ready to accelerate your workflow? Explore the Sparklet UI Designer – Flint documentation for complete plugin usage guides and best practices.
https://sparkletui.com/documentation/